How to Bake a Festive Christmas Tree Cake for the Holiday Season 🌲
It’s that time of the year again—Christmas is almost here! 🎄 This festive season, why not surprise your family and friends with a homemade Christmas tree-shaped cake? This delightful and creative cake not only tastes amazing but also serves as a beautiful centerpiece on your holiday table. If you’re ready to add some holiday magic to your baking, follow this guide to create a cake that looks just like a Christmas tree!
🎂 Ingredients You’ll Need
Before we dive into the fun process of baking, here’s a list of all the ingredients you’ll need for this delicious cake:
- For the Cake Base:
- 2 cups all-purpose flour
- 1 ½ cups sugar
- 1 cup unsalted butter, softened
- 4 large eggs
- 1 cup milk
- 2 tsp baking powder
- 1 tsp vanilla extract
- Green food coloring
- For the Frosting:
- 2 cups powdered sugar
- 1 cup butter, softened
- 2 tbsp milk
- 1 tsp vanilla extract
- Green and red food coloring (optional)
- Decorations:
- Edible glitter or sprinkles ✨
- Mini candy canes, silver balls, or chocolate ornaments 🎄
Now that we have everything ready, let’s begin with baking!
🥣 Step 1: Prepare the Cake Batter
In a large bowl, start by creaming together the softened butter and sugar until it’s light and fluffy. Next, add the eggs one at a time, mixing well after each addition. Stir in the vanilla extract for that sweet holiday aroma. Then, in a separate bowl, combine the flour and baking powder. Gradually add the dry ingredients into the wet mixture, alternating with the milk. Mix everything until it’s smooth and creamy.
For the holiday look, add a few drops of green food coloring to the batter until it reaches your desired shade of green. This will make the cake resemble the beautiful color of Christmas trees! 🎄
🍰 Step 2: Pour the Batter and Bake
Preheat your oven to 350°F (175°C). Pour the batter into a tree-shaped cake mold, available at most kitchen stores during the holiday season. If you don’t have a mold, you can pour the batter into a regular baking pan and carve it into a tree shape once it’s cooled.
Bake for about 25-30 minutes, or until a toothpick inserted in the center comes out clean. Let the cake cool completely before moving on to the frosting.
🍃 Step 3: Prepare the Frosting
While the cake is cooling, let’s make the frosting. In a medium bowl, beat the butter until creamy. Slowly add the powdered sugar, milk, and vanilla extract, and keep mixing until you get a smooth consistency. If you want to color the frosting, add a few drops of green food coloring to keep up with the festive theme.
If you’d like to add some extra magic, divide a small portion of the frosting and color it red. You can use this to add accents to your Christmas tree cake, like tiny ornaments! 🎨
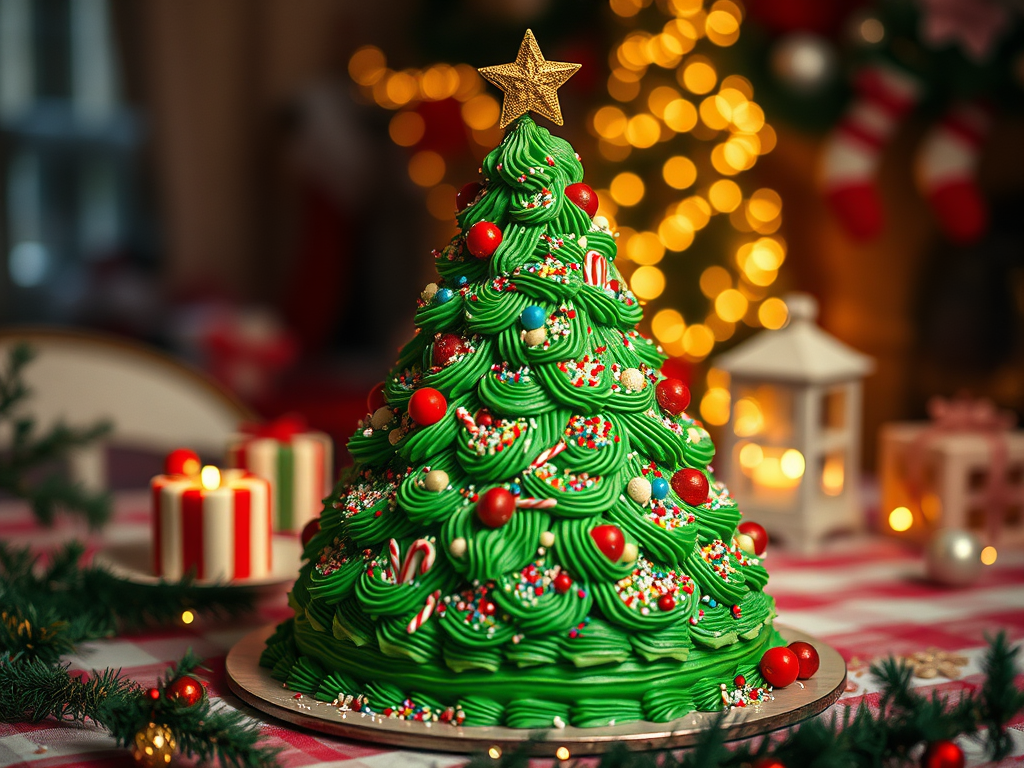
✨ Step 4: Decorate Your Christmas Tree Cake
Now it’s time to decorate! Spread the green frosting evenly over the entire cake to give it a lush, tree-like appearance. Use a piping bag to create branches or texture, if you want a more realistic look.
To make your cake sparkle, sprinkle some edible glitter over the frosting. Decorate with mini candy canes, edible ornaments, or even tiny chocolate balls as “ornaments” on the tree. Add a star-shaped candy or frosting on top of the cake to complete the Christmas tree look. 🎄
🎉 Step 5: Display and Serve!
Your beautiful Christmas tree cake is now ready to shine at your holiday gathering! Place it in the center of the table, and watch as everyone’s eyes light up with joy. This cake is not just a treat for the taste buds but also a visual delight, capturing the spirit of Christmas. 🍰🌟
Conclusion
Creating a Christmas tree cake is a wonderful way to add an extra dash of magic to your holiday celebrations. This easy-to-follow recipe is perfect for bakers of all skill levels, and the results are sure to impress your loved ones. So, this season, roll up your sleeves, gather your ingredients, and start baking! Your homemade Christmas tree cake will be the star of the show, adding warmth, joy, and sweetness to your festivities.
